

How To Use Windows Repair Disc
Windows x offers multiple recovery options to help y'all troubleshoot your system when a serious mistake occurs. If you take a recovery bulldoze or arrangement repair disc, you tin can use it to revive your PC later a system failure.
System Repair Disc and recovery drive offer effective recovery solutions with restore tools to troubleshoot organization errors. This manner, you lot are not entirely dependent on your luck or a smack to get your system working over again. But, there are some central differences between these ii recovery media types.
What's the Difference Between System Repair Disc and Recovery Drive?
Every bit the name suggests, a system repair disc is a Windows repair tool burned to a DVD. Information technology is a bootable disc that contains organisation recovery tools to troubleshoot Windows startup problems and restore a organisation image backup.
While the organisation repair disc feature was introduced with Windows 7, the recovery bulldoze choice arrived with Windows 8. The recovery bulldoze uses a USB flash drive to create a bootable bulldoze. It contains all the troubleshooting tools provided by the system repair disc and some more than.
Since the recovery bulldoze offers an selection to copy system files required for Windows installation, you tin use it to clean install Windows x, if needed. Y'all tin can't achieve this with a organization repair disc.
That said, you can use the USB recovery drive merely to troubleshoot the PC that yous used to create it. In contrast, a organization repair disc will work with any system running the same version of Windows ten.
How to Create a Recovery Drive
Connect a USB flash drive that you want to use for the recovery bulldoze to your PC. Microsoft recommends using a USB bulldoze with at least 16 GB of storage. Ensure the USB drive is empty, as this process will erase whatever information stored on the drive.
Likewise, format the USB drive to the NTFS file organization to avoid any bug when creating a recovery drive.
To create a recovery drive:
- Input recovery drive into the Outset menu search box and select the All-time lucifer.
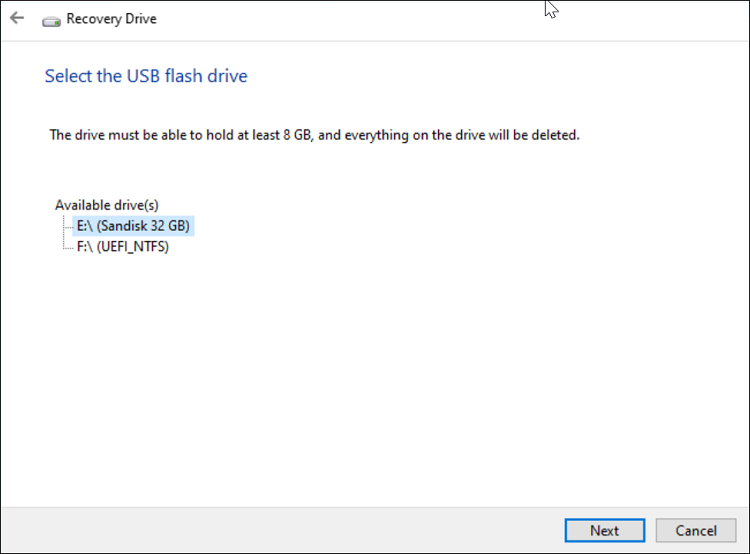
- When the Recovery Drive window opens, check the Dorsum up system files to the recovery drive box. Copying the arrangement files is optional, and the recovery drive process may take a flake longer to complete, but we suggest you to keep it ticked. Click Next.
- Windows will scan for available USB drives and listing them. Select the USB drive from the list and click Next.
Read the description in the recovery drive window and click Next to initiate the recovery bulldoze creation process. Windows will kickoff format your USB drive to the FAT32 file organization and so copy the necessary files. This process may take some fourth dimension.
Once the process is complete, shut the Recovery Drive window and squirt the USB storage. Y'all can apply this recovery media to troubleshoot Windows startup issues, admission advanced kicking options, and refresh and reset your PC in instance of a system malfunction.
How to Create a Organization Repair Disc
Needless to say, to create a system repair disc, you need a blank DVD/CD and a DVD-RW drive.
To create a system repair disc:
- Input control console in the Beginning menu search bar and select the All-time lucifer.
- In the Control Panel window, select System and Security > Backup and Restore (Windows seven).
- On the left pane, click the Create a system repair disc link. Insert a DVD or CD into the DVD drive if y'all oasis't already.
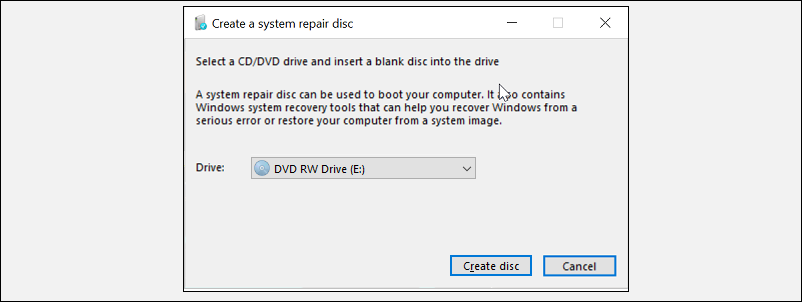
- In the Create a system repair disc window, click the drop-down button and cull your DVD/CD. Then click the Create disc button to proceed.
Windows will outset the process of creating your system repair disc. Since information technology does not involve copying system files, the process will complete quickly. Afterwards the disc is created, read the important information presented on the screen to understand the employ. And so, click the Shut button and eject the disc.
As discussed earlier, different the recovery bulldoze that is tied to your PC, the system repair disc is linked to your PC's Windows edition (32-chip/64-scrap). Therefore, you lot tin use it to repair whatever computer as long as the Windows version matches the repair disc version.
How to Employ the Arrangement Repair Disc or Recovery Drive to Restore Windows ten
When Windows fails to outset correctly, it will automatically kicking from the recovery partition and load advanced startup options. However, if it's unable to load or repair itself, you can utilize the recovery bulldoze to troubleshoot the computer.
Insert the recovery USB drive or DVD into your PC and power it on. Your PC will boot from the recovery bulldoze automatically and bear witness the Troubleshoot screen. If it doesn't, change the boot order to boot from the recovery drive.

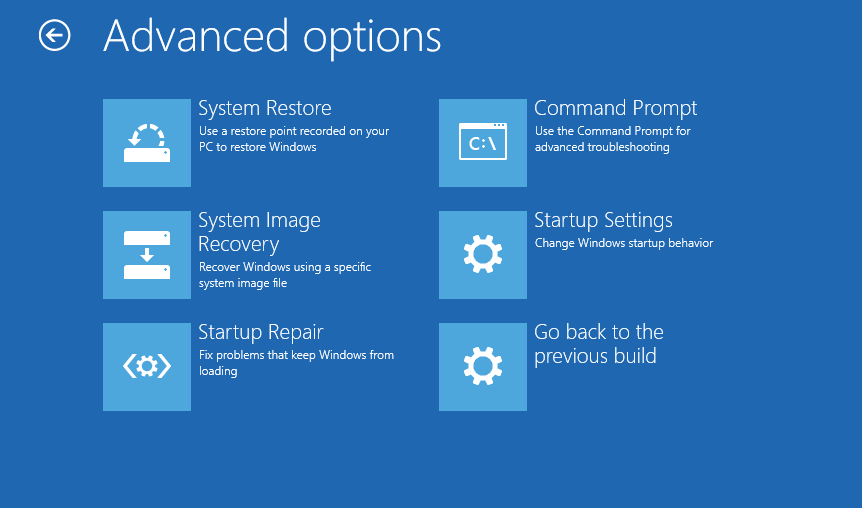
Once your PC boots from the recovery drive, y'all tin can choose to reset your reckoner or access Advanced options. We recommend you endeavour the Avant-garde options first. It consists of system repair options such equally Organisation Restore, Recovery from Organisation Images, Go Back to the Previous Version, and Automatic System Repair.
Equally a last resort, if the avant-garde options did not help, use the Reset your PC choice to clean install Windows 10. The reset process will reinstall Windows, delete all the files, and remove apps that did not come up with the Os.
Create a Recovery Drive Earlier Your PC Goes Kaput!
Now that you know how to create a system repair disc and USB recovery drive in Windows 10, it is time to create one before your PC stops working. If possible, create both the recovery media. While the recovery drive can help you reinstall Windows, you can utilize the repair disc to restore your computer from a organization image.
Since neither of these recovery methods backs upward your personal files, make sure to create a good backup routine. So, when the disaster strikes, yous will be able to minimize the damage.
About The Author

Source: https://www.makeuseof.com/create-recovery-drive-system-repair-disc-windows-10/
Posted by: chapmanorry2001.blogspot.com
0 Response to "How To Use Windows Repair Disc"
Post a Comment